1 – Take a photo of your home learning
2 – Save your photo on to the ‘Picture’s folder’ on your PC or photos in your phone.
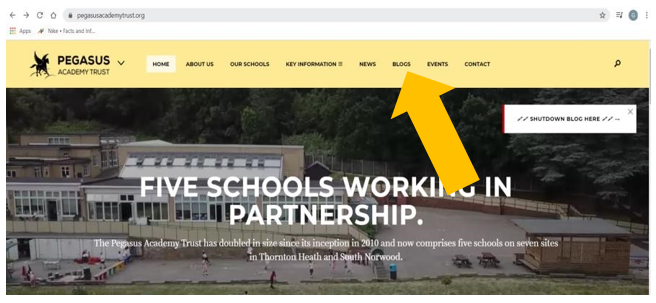
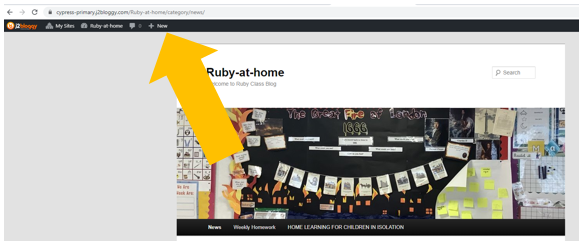
3 – Click the blogs link
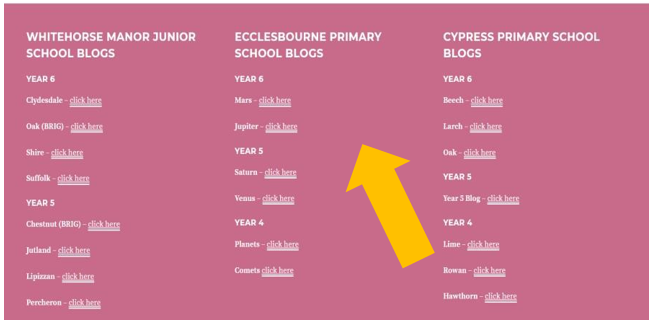
4 – Click on your class name
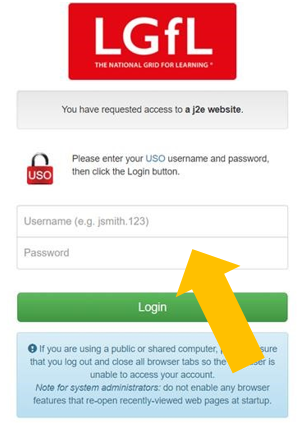
5 – Use your USO login using the .306 name and password (the same as you use for the computers at school)
6 – Click on ‘+ New’ (add post)
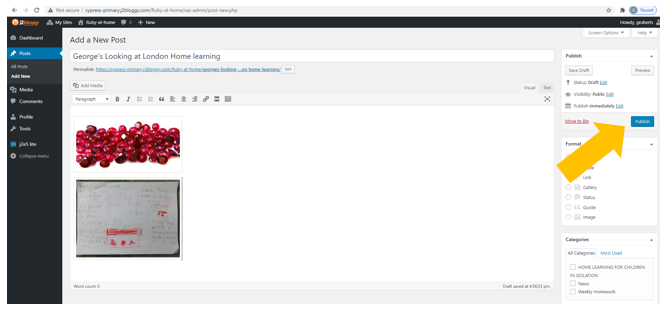
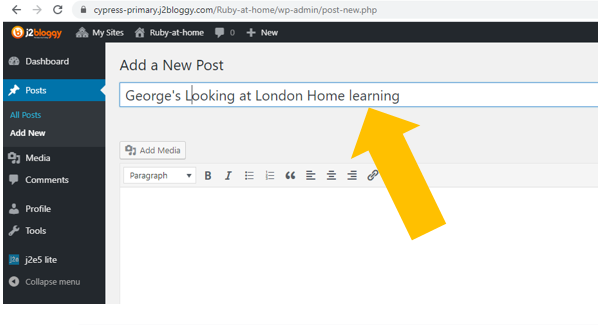
7 – Add your name and title of your learning
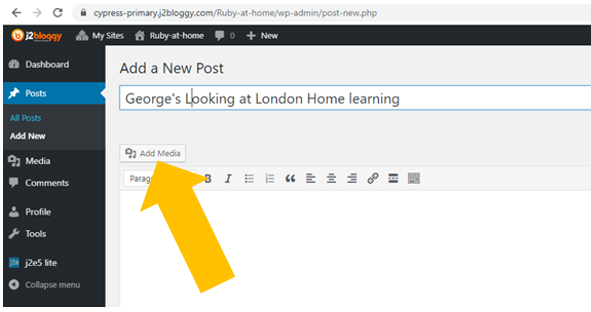
8 – Click on ‘Add Media’
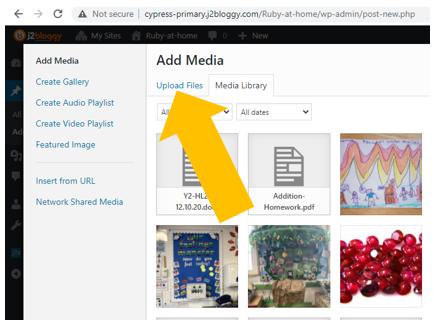
9 – Select ‘upload files’ and add your photo from wherever you saved it earlier
10 – When your photo is shown in the list highlight it and click ‘Insert into Post’ (bottom right hand corner)

11 – Don’t forget to click on ‘Publish’ so that everyone in the class can see your post!